- No.609, Centre Of Huijin Nanxiang, Yinxiang Road, Nanxiang Town, Jiading District, Shanghai, China
- sherry@sanmachines.com
- +86-18616767021
Tips and Tricks: Cutting Acrylic with Your CO2 Cutter!
Acrylic cutting is common in laser processing because acrylic is a common material for this application. However, getting a nice cut can sometimes be a problem, especially for thick acrylic. We are happy to share this article about this application and hope it will bring you useful solutions.
How to cut thick acrylic and get a crystal clear edge? There are a few things to keep in mind when cutting thick acrylic.
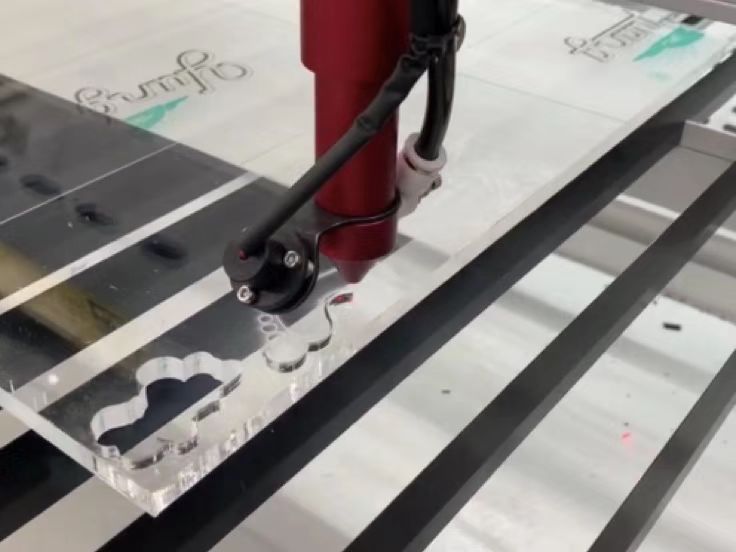
1. Use a focusing lens (4 inches)
If the standard lens of the laser machine is 2 inches, then the maximum recommended acrylic thickness is 10 mm. If you want to cut acrylic with a thickness of 15 mm or 20 mm or even thicker, you should choose a 4-inch lens to achieve this.
2. Minimize the blowing of the pen carriage
Many people like to use a strong blow from the pen carriage and blow strong air against the top of the acrylic. Most people think that this will cool the acrylic down and extinguish the flame on the surface. However, this only works for laser engraving or cutting thin materials. When cutting thick acrylic, if the flame goes out on the acrylic, it may be that the laser is not powerful enough to completely cut the acrylic, or the speed is too fast.
If you are cutting thick acrylic, you need to cut with more power at a lower speed. When strong air from the pen carriage blows on the top of the acrylic, the top edge of the acrylic will usually form a fuzzy or milky color. The minimal air blow on the pen carriage is mainly to protect the lens from contamination.
The trick is to introduce as little air as possible from the compressor. This can be adjusted with the air adjustment screw on the laser machine.
3. Align the center point of the acrylic
Operate the autofocus process as usual on the top of the acrylic. Then you need to adjust manually, moving the table up by 1/3 or even half the material thickness.
The table moves up 3-15 mm, which is equivalent to 1/3 of the material thickness, and then 15-30 mm, which is equivalent to half the material thickness.
4. Create a strong exhaust flow at the bottom of the heavy acrylic
A good exhaust system is the first condition for a good working environment. The role of this airflow is to prevent flames at the bottom of the acrylic by pulling out flammable gases. The best way to do this is to use a Smartbox, which is available as an optional accessory for the GCC LaserPro laser engraver, and the S400 already has a grid table built in.
Place a thin sheet of aluminum foil or plate on the grid table to cover the entire working area. The acrylic should be about 2-10 cm above the grid table. See the instructions and pictures below.
5. Use high resolution parameters
When cutting thick acrylic with curves or large circles, resolution is a key factor and the DPI parameter must be set to 1000 or above. In addition, the PPI (pulses per inch) must be set to all "X".
When the machine starts cutting, the laser burns a hole in the acrylic material and passes through the sheet, and all the air/exhaust is pulled out of this hole due to the strong airflow created.
Related product links


 Cutter News
